Calligraphy + Watercolor Name Cards

Friday, April 25, 2014

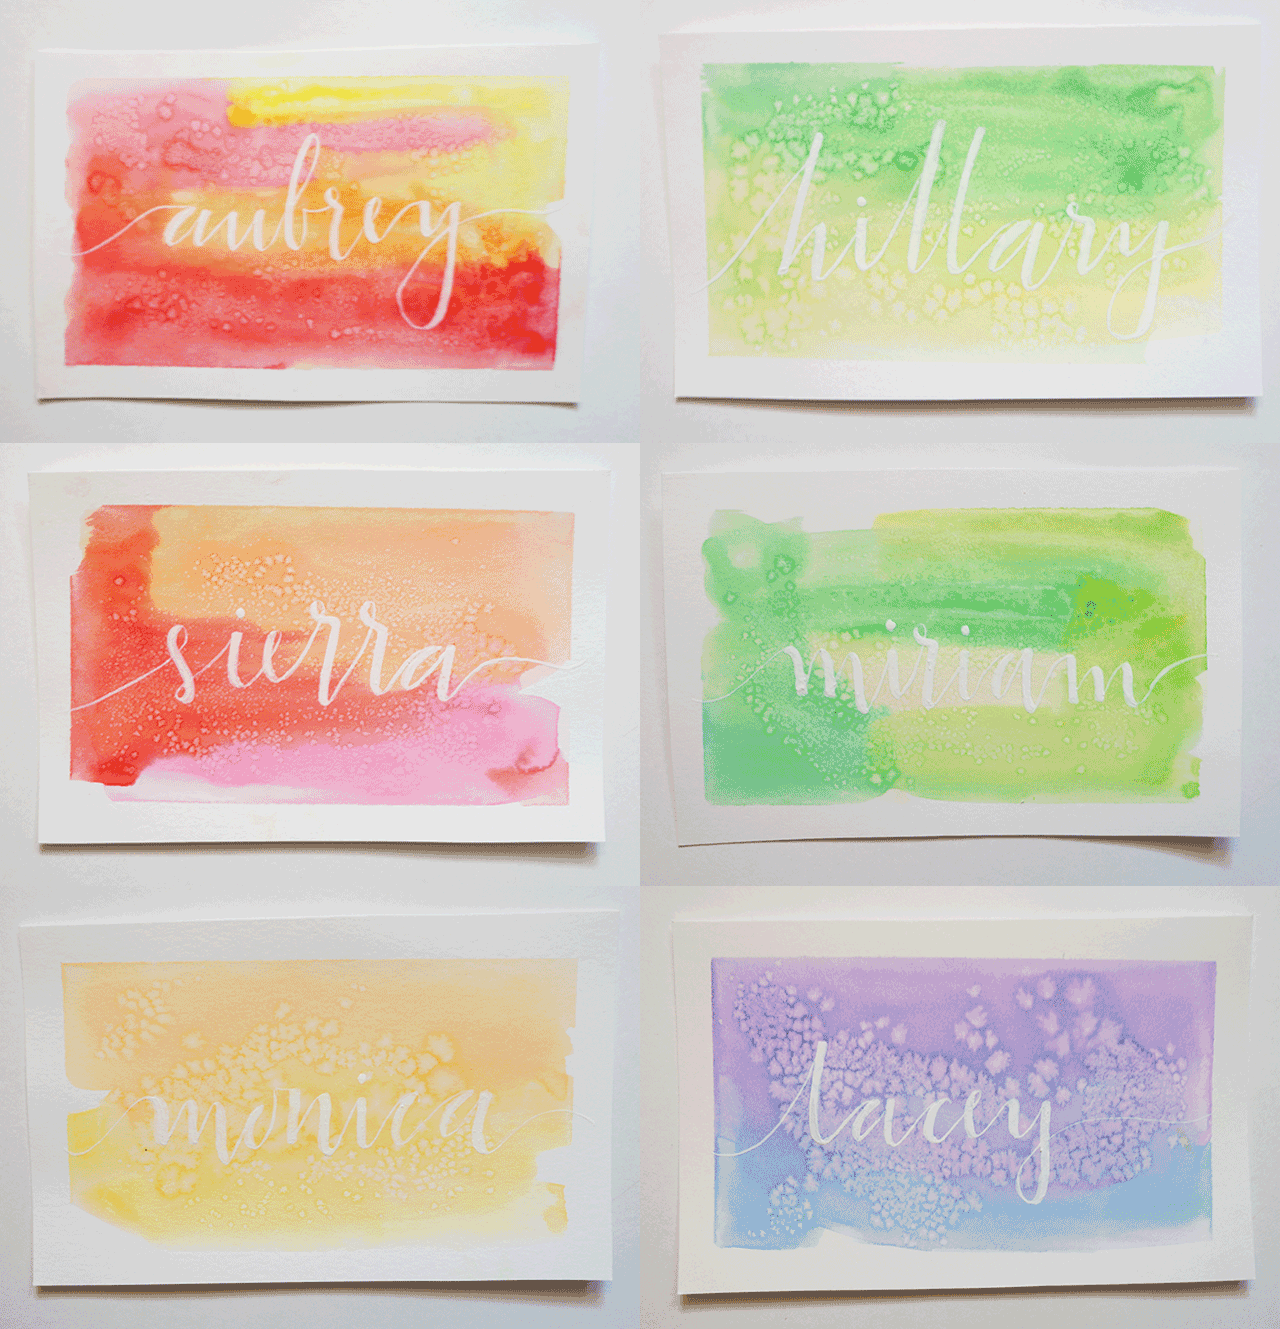
I designed a few watercolor and calligraphy name cards.  A good friend of mine, Aubrey, was hosting her first Color Workshop where she trains hair stylist in hair painting.  She basically gave me all creative control and I knew I had to do something beautiful.  I decided to add a watercolor wash to white bristol board and use white gouache to calligraphy each girls' name on top of the watercolor.  They couldn't have come together any more perfect.
Still from video by Joshua Brown Photography
Photo by Joshua Brown Photography


If you are interested in your own set of cards please message me or you can email me at amedetails{at}gmail.com.

New Stamps & A Giveaway!

Wednesday, March 5, 2014

Welcome to my new line of stamps!  They all center around the idea of giving 'with love'. The two stamps featured 'Made With Love From The Kitchen Of' and 'Grown With Love From The Garden Of' are two of my initial releases (I have more to come with lots of fun ideas).  Grown With Love From The Garden Of::The idea of giving flowers or vegetables from our home grown garden is my favorite.  We had a small garden box last year and it still produced more food then the two of us could eat.  I love the idea of wrapping up some vegetable or putting them in a cute basket and tying a cute tag around the handle and leaving as a gift on a loved one's door step- or even better bringing them as a hostess gift!
Another fun idea is to wrap up some of your beautiful flowers that you have grown and leave a bouquet for a friend.  Our neighbor across the street has the most beautiful flower garden that blooms all summer long, I think this would be the perfect stamp for her to occasionally clip some flowers and wrap them up. 


Made With Love From The Kitchen Of::

My second stamp is based off of giving home made goods.  Made With Love From The Kitchen Of stamp can be used for anything from your kitchen: cookies, cakes, breads, meals, dinners- whatever you love to cook or bake will be perfect as a gift.  I personally love to bake banana bread and leave them for my neighbors, especially around the holidays.  Attach a tag in pretty ribbon and now it is the perfect just-thinking-of-you gift.


With all that said, I am offering a giveaway to celebrate my new site and line of stamps! Two stamps, one each of the stamps above with a blank area on the stamp so you can handwrite your name in on the tag. Each giveaway stamp will come with a couple blank white gift tags. 

To enter, leave a comment letting me know what you would make, bake or grow and who you would give it to.  You can also leave a comment on my instagram giveaway photo for an extra entry. I will be picking two winners: one from instagram and one from my blog on Friday March 7th.  Thanks so much for your support and love and good luck! 
If you are interested in purchasing a stamp with your name written in calligraphy or a blank one, please check out my shop.

Antler Bobby Pins

Thursday, January 9, 2014

When I went home for Thanksgiving, I came bearing gifts.  I found some inspiration on pinterest and decided to make a couple pairs of antlers for my sisters and cousin and I.  They were so fun and easy to make and we had a great time sporting them.I shaped all the pins out of black oven clay and cooked them as directed.  I then sprayed them all with gold spray paint, added gold glitter to the ends and glued on a bobby pin with some tacky glue. So fun and festive for the holidays.

Calligraphy Christmas Pillow

Monday, December 2, 2013


In honor of December, I thought I would show you my friend's work. She #cantstopchristmascrafting and I have always considered her one of my most talented friends. I truly wish I lived closer to her but thankful for instagram so I get to see it all!

She borrowed my calligraphy in 'Merry' and 'Bright' from a wood project I have been working on with my friend Ally (big post on that soon!) and applied it to one of her Christmas pillows. She is so so talented and I love how it looks! Now I need to borrow her stocking example and make some of my own!

Easy DIY Pom Pom Pillow

Friday, November 29, 2013

I obviously have had an urge to change up some pillows over here (and have one more to show you!) but I thought I would show you a quick (like took me less than an hour or two) pillow update. I have a couple blank white Ikea pillow covers and have gotten a bit tired of them. I saw this pillow at Anthropologie and loved it and also knew what I would be doing to my Ikea pillow cover. I want to make this is additional colors too, but thought a classic black and white one would be perfect for us right now. 

A bit of easy math...
I first figured out how many larger stripes I wanted (three, in my case). Then I estimated how many rows of pom pom trim I would need to make the three big stripes (five smaller rows of pom pom trim to make one larger black stripe). I measured my pillow and multiplied that, in my case, times 5 (for the rows of trim) times 3 (to make the larger stripes)... and then I rounded that number up a bit because you never want to by left with not enough. I bought my trim from this etsy shop.

Sewing...
Measure where you want your larger stripes on your pillow and mark them. Since I was sewing to an already made pillow case, I started with the stripe furthest from the zipper (to get the hardest part over first). I sewed five rows of trim (with coordinating color thread) in the vicinity of my marked line, making sure to sew the trim as close as possible to each other. I repeated sewing five rows of trim in the middle and then again closer to the zipper. Done.

If you were making a case from scratch, I would recommend cutting out your fabric in the size you want as the pillow cover; marking the place where you want the stripes; sewing your trim to the front of your fabric (this part you will find much easier compared to sewing to an already made case) and then sewing three sides closed to make your case, closing off with a zipper or a fold. 


How to: Knit Pillow

Tuesday, November 26, 2013

We had a pillow form an odd size and I wasn't a huge fan of the original cover so after seeing all the inspiration for knitted pillows I decided to give it a shot myself. I originally wanted this to be in a grey (and still might do it) but couldn't find the yarn and desired to go with a mustard yellow since it is a universally pleasing color as a pillow and compliments most of my bedding.

I tried to make this pillow a couple different ways before just settling on the easiest. 

First try- I used giant knitting needles (size US 35- 19mm) with the yarn (Patons Wool Roving Yarn) and it produced too much of an open knit and any tug on the case would make it not look neat. I still want to use those needles to knit something beautiful but I need to find much larger yarn or roving to to so. 

Second try- I decided to knit the first long side and link the ends as I worked my way knitting the second long side (potentially eliminating the need to close the seems and producing a case by the end of all my knitting). This sounds confusing just typing it and it just didn't work- I don't recommend trying it. 

Third try-  I undid the attempt to link the side together and kept the first long piece I knitted. This piece measured to be one side of the length of the pillow. I then decided to switch things up (to keep the project interesting) and created a different pattern for the second half (or other side of the pillow). I did a knit, purl, knit, purl etc. to create this cross shape pattern shown below. I found that you had to keep track a bit, because when you got to the end of the row, you had to start with that same stitch you finished off with. For example, if my row ended on purl, I had to start with the purl stitch for my new row to keep the pattern looking right.  Once the second half was the same length as the first I finished it off and added four monkey fists/ sailor's knot to close the pillow. These were pretty difficult to make with this yarn, don't hold up well and probably wouldn't do them again but it was fun to learn something new (and, well, as you can see I used them anyways). 

In the end, I used two skeins of the yellow Patons Wool Roving Yarn with a set of size 13 or 9mm knitting needles to make a pillow measuring 22 inches by 15 inches. For any pillow project, I find the easiest way to knit a rectangle twice as long as your pillow so all you have to do is fold it in half and close up the three sides. Of course you can do it in two squares or rectangles, too, and close up the four sides. 
If you have any questions or try it let me know!

Easy DIY Microwaveable Rice Bags

Wednesday, November 20, 2013

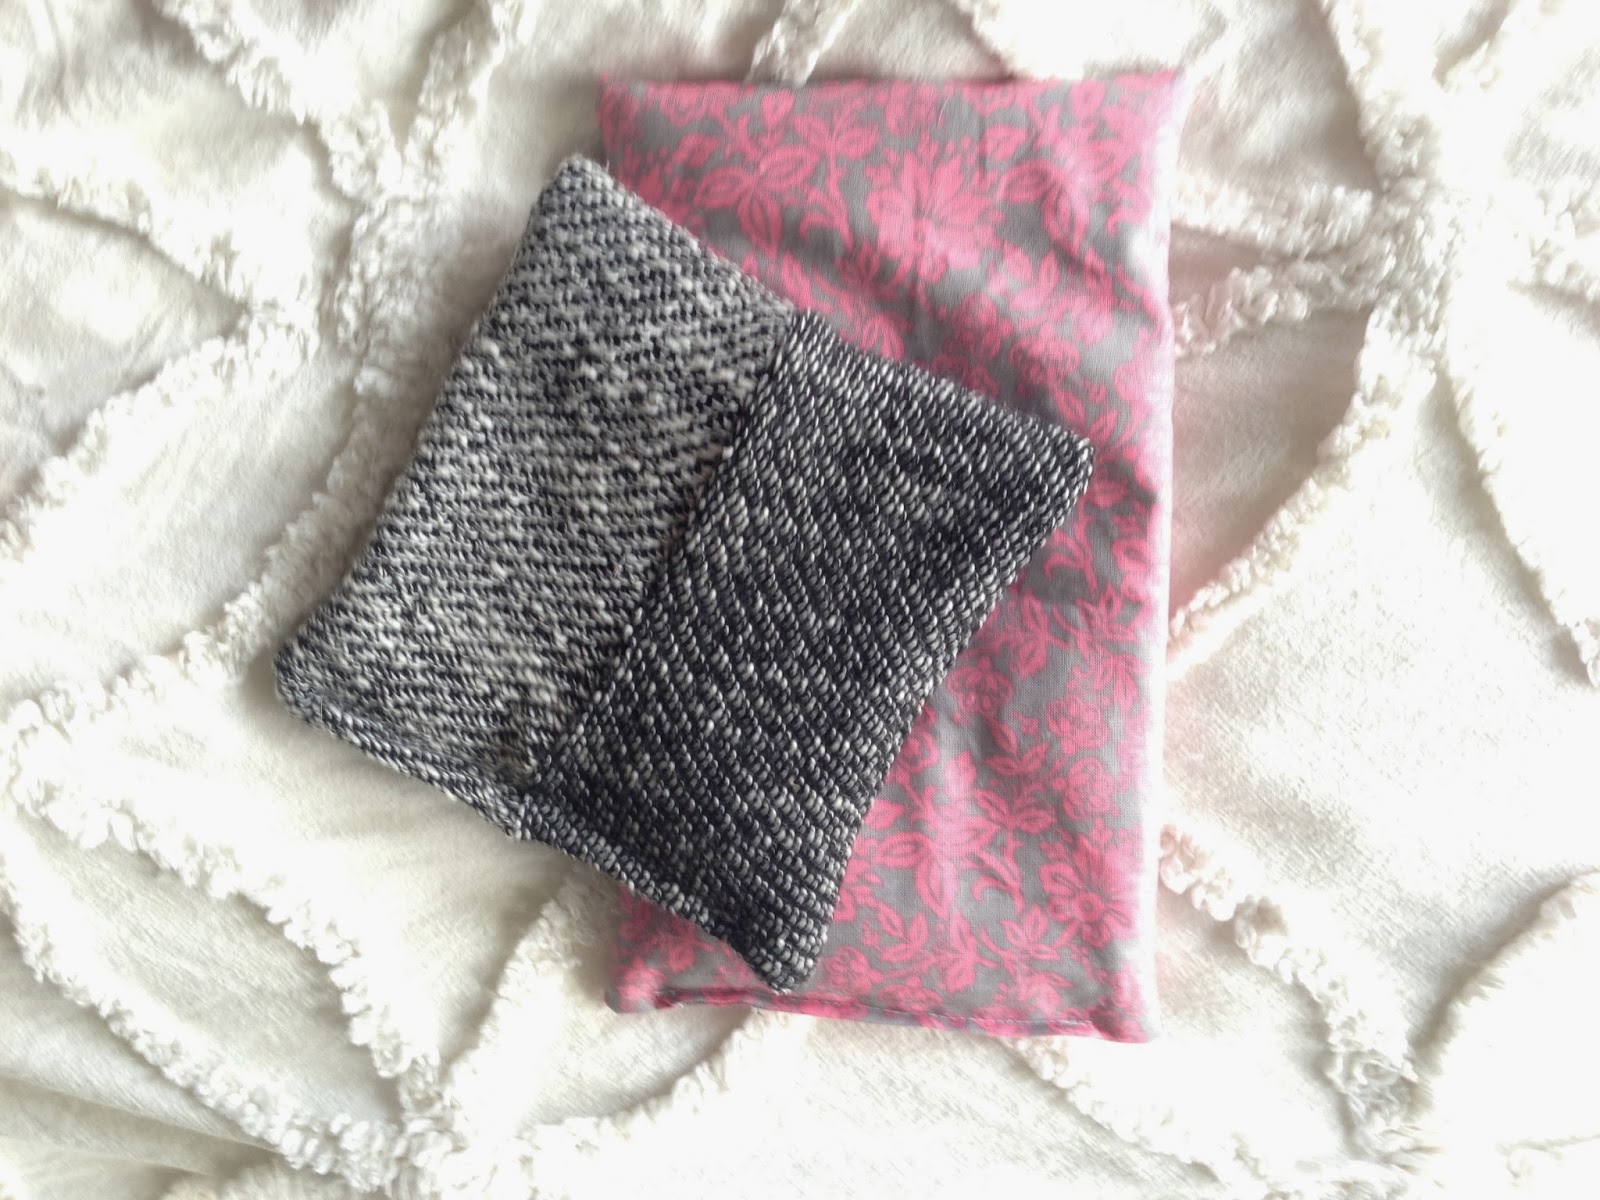
I have been having some bad jaw pain and heard that a warm heating bag will help relax the muscles. Well I went to town sewing up some of these and couldn't believe how easy they were to make. Turns out they also have been great to heat up on cold nights and warm us up, relieve a sore neck or back and even calm a stomach ache. My favorite is to heat one up and put it on my chest when I am chilled and it warms my whole body.

I made a couple different sizes for us based on the fabric scraps I had on hand.
What you will need:
Fabric scraps in the shape you would like (long rectangles make for nice neck wraps)
Rice
Dried lavender
Lavender essencial oil (optional)
Sewing machine

-Mix 3:1 rice to dried lavender in a bowl (you can add more lavender to your preference) and add a couple shakes of lavender essential oil. Mix.
-Sew up three sides of your fabric scraps. Turn right side out.
-Fill half way to three-quarters of the way full of your sewn bag with the rice and lavender mixture. You don't want it all the way full!
-Sew last side of rice bag closed.
-Heat in microwave for 1-2 minutes. We found that 2 minutes makes it pretty warm but when it cools down a bit it is perfect.

This is a much more organized way of making these. Truthfully, I sewed my scraps, poured rice in, poured some lavender in and put a couple shakes of lavender oil in. Then I sewed them closed and warmed them up. Either way it all works out and is lovely. They make great gifts too!

Letters For Scott

Monday, November 18, 2013


Scott left on a big trip, or vacation as I would call it- he definitely wouldn't call it that. He is traveling almost every other day for interviews but we get a break to be together the week of Thanksgiving (thank goodness! I miss him!).  Last minute before he left I decided to put together this project for him.

I was inspired by it here, but didn't have the time to put that much effort into it. I wrote him a letter, added a quote at the bottom and printed off a bunch of pictures that most of the time coincided with the topic of the letters. I also wrote on the back of the pictures. I figured enough cute pictures of Wesley sleeping and of us would hold him over for a while and so far he said he really liked them. I found the letters much easier to write then I thought they would be, and since I didn't include a bunch of other stuff then pictures it all came together really quickly. The topics for my letters were: open when... you are happy, you are done with your first day, you are feeling sad, you are bored, you are hungry, you miss me, you are almost done with traveling, you need my love. I miss you baby!

Cable Knit Headband

Wednesday, November 13, 2013


I found this free knitting pattern for a cable knit headband and couldn't get it out of my mind. I have never cable knit anything before but after a couple times of taking it out and starting again (plus a you-tube video), I found it really easy to do. The stitch requires you to transfer some of your loops to a different needle and either hold them in front of or behind while you work on your other loops, I didn't get that every other transfer had to be held behind so it didn't look right (I realize that you would have no idea what I am talking about if you are not familiar with knitting the cable stitch).

Anyways, I altered the pattern a bit by making it five stitches wide for each cable instead of three to ensure that it would cover my ears when out in the wind and cold up here in North Dakota. I need to flatten it out a but but love how it turned out, a great alternative to a beanie if it isn't too cold outside.

DIY Scalloped Shorts

Friday, October 4, 2013


(I am also reposting this from my old blog because this is one of my favorite projects I have made and still continue to love them!)

I did it! I made my first pair of shorts ever.  I had this idea that I wanted scalloped shorts and they somehow worked out.  I spent a total of around $7 and it took a couple days. I will share with you how I made them since there is not a good way for me to reproduce and sell them.

My first attempt- I first bought a large (size 12) pair of shorts with a stretchy waste band in the back from Salvation Army for $2 and scoured the web on patterns for making shorts. I wanted them with pockets and a fly in the front. So I totally deconstructed the shorts, attempted at making my own pattern with pattern paper and and old pair of shorts. I liked my old pair of shorts so I didn't want to take them apart for an exact pattern so my paper pattern ended up being a rough approximation. I sewed all the piece together and, it was 5 inches too short in the back, I put the front panel on backwards, 3 inches to tight in the front and just didn't work. I couldn't even take a picture of them because they don't even cover some parts of my body.

Second attempt- Luckily the thrift store was still having their '50% off red tags sale' and they had another pair of the same pink stretchy shorts so I bought one more pair for $2 and tried again. I gave up on putting in a fly and pockets of any kind for now.  This time... I took out the waist band (just cut as close to the elastic as possible. If your shorts don't have the elastic sewed into it then you can just simply pull the elastic out by taking out a few stitches). My shorts had side pockets on the hips, so I took those out too.  Then I just started sewing... I took in the seams on my sides along my hips, I took in the seams  (by like an inch at first) along my inner thigh and crotch and left the extra length alone (both toward my tummy and toward my knees. Make sense?? Like I left the length in the waist band super high waisted till later and the length of the shorts super long to my mid-thigh). I just kept slowly taking in along those two seams mentioned above (mostly the side hip seams) until they fit pretty snug to me (to where I could still slip them off).  I also ended up taking in a small 1/4 of an inch along the back (butt) seam from the top of my bum to the waistband.


So once all of these seams were about done... I needed to take in one last time to get it snug and put a zipper in. I also needed to make the waist band. So before my last stitches I marked (with a washable marker- you could use anything that will wash out) where I wanted the top of the shorts to fall on my waist. I slipped them on carefully, measured how much needed to come in to be a snug fit, slipped them off and sewed them in. I then ironed the side-hip seams flat, rolled in the waist band and stitched it in place. Then, since the seams are flat, I inserted an invisible zipper using a method similar to this... except I didn't baste stitch, I had a real stitch which I preferred. I sewed in my zipper with a zipper foot, finished it and picked the stitch of the shorts where the zipper was. Now, I had a zipper in my shorts and I could try them on and they fit right in my legs, right in my hips, the waist band was done... now to the scallops.

I used this tutorial for the scalloped edges. I had to do a little measuring to make sure that my shorts would be the same length on, but I didn't have any problem scalloping in a circle around the leg. If I could do it again I would probably do 1 or 2 fewer scallops but otherwise I think it turned out well. I did at first not like that the scallops were so deep, so I sewed them shallower, and then zigzagged around the edges of them.  Sewing scallops is actually kind of difficult once you turn them right side out and I realized my shorts may fall apart if I don't top stitch the scallops in place. Also the top stitching would help holding the shape after I wash the shorts.

Now I am thinking about adding a back pocket and maybe some belt loops... but other than that, that was my adventure making shorts. It really just was buying a big pair and sewing them in to my size. Good luck and let me know if you try it out!

Lilly Pulitzer ShortJ.Crew Short

DIY Warm Scalloped Scarf

Monday, September 30, 2013


(I am reposting this post from my old blog because my mom loved it and is working on one herself, so I thought I would make it easier for her and you if you wanted to make a scarf).

I started this project when my husband was studying for Step 1 of his national boards. I had to start over a good 4 or 5 times (once I was four rows in!) but the final scarf turned out great and I love it. Here is the link to her instructions, but if you are like me and have never done a double stitch or Catherine's wheel stitch, I would recommend watching this video. Once I found this video that is when I started over because it is much easier to follow and figure out the pattern

I wanted a thicker scarf for winter so here are some changes I did:
*I used a size 6 crochet hook (size 10 was HUGE)
*I started with 161 stitches (your scarf should be made in sets of 10 stitches + 1- the link explains that) but then realized my scarf was too short, so I added on at the end, but you could just save yourself the trouble and start with 191 stitches (or another 10 if you want it a little longer). My final scarf measures around at about 58 inches which I found not too long or too short and gave a nice bulkiness at my neck to keep me warm. I did a total of 16 rows (each row is half of the wheel)
*I wanted my scarf to have scalloped edges so I went back around and finished the rows to give a scalloped edge.
* I found I needed 3 skeins of yarn (the same kind she uses). I didn't use the whole 3rd one but will use the left overs for a beanie

DIY (Another) Rug

Tuesday, April 2, 2013


I did it again, I painted another rug. Actually the backside of my last painted rug. This time I did a less involved pattern and would recommend it highly to anyone who wanted to paint a rug. By 'less involved pattern' I mean less tape but it did take more time and measuring so I guess it is just as involved...

DIY Spring/ Easter Wreath

Wednesday, March 27, 2013


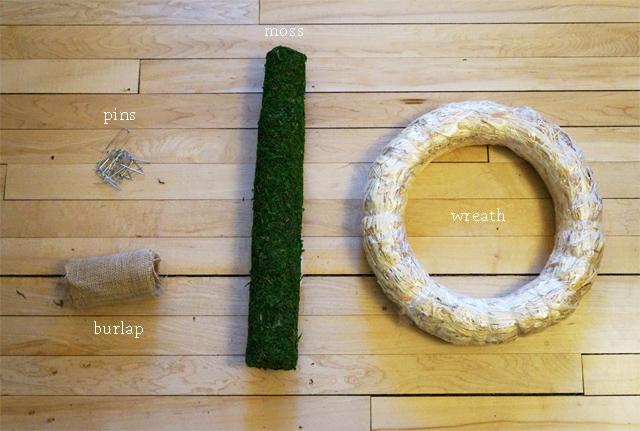
I was searching for a nice spring wreath I could make for my door. I found the perfect one at Williams Sonoma and knew it was just what I was looking for. It was super simple, took me about an hour and cost less than $15. Here is how I made it:

1 straw wreath the size of your choice (I got mine at Joann's- bring your coupon!)
Moss (I bought a moss mat at Joanns- bring your coupon!- but loose moss or moss "ribbon" will do)
Burlap ribbon/ leftovers


I bought the moss mat because I got more good looking moss for my money, but if you can find some other moss that you like the look of then use that.

-If you are using a moss mat, cut about 2 inch strips (these don't have to be perfect). If you use moss ribbon, then just pin one end and keep wrapping all the way around. If you use loose moss, then take chunks of pieces of moss and pin down till your wreath is full.
-Use a floral pin to secure one side down on your wreath and wrap the moss around your wreath, pinning the other edge when done. Continue wrapping strips of moss around overlapping where you left off and pinning the edges.
-Fill in any gaps you may have.
-Add a burlap bow to the top or bottom and hang on your door.

Super easy, quick and beautiful!

DIY Painted Rug

Wednesday, February 13, 2013

I did it! I finally painted a rug. I have been thinking about it for a long time, bought the rug over a year and a half ago and have done lots of research on it. I finally decided on a pattern I was going to be ok with for the long term (after seeing it in other people's houses) and could see us using it later on down the road. It also took me a long time to commit to this because I couldn't decide on a pattern I liked or a color (I am afraid of color and I think the bigger issue is I don't know my own style).

Here is how I did it and some of my tips if I were to do it again

DIY Easy Reupholstered Ottoman

Wednesday, January 30, 2013


A couple months ago we got a new chair for our living room. And if you get a new chair for your living room you are going to want something to put your feet up on when you sit in it. So instead of spending a bunch of money on an ottoman we decided to (kind of) make one. The options to make one from scratch involved a lot of supplies, time and more energy then we wanted to put into it so we decided to find something that we mostly liked and make it something we love. We found this ottoman on the upper left from Target and just put some fabric over it- simple as that.

How to easily reupholster a stool/ottoman:
-- Find a stool/ottoman you like the general shape and legs of. We found ours at Target: a fan of the wood base of not of the fabric.
-- Get some fabric you like to cover your ottoman in. I chose a grey wool felt from Joanns. It was a nice neutral that would look good with the rest of our room and through different seasons.
-- We unscrewed the top cushion from the wood base (it was like 5 screws)
-- Put your cushion down on your fabric and trace an outline of it adding about 1" or more for seam allowance. I always like to add a little bit more seam allowance because I can take it in later if it is too big. Cut piece out (piece A).
-- Also cut a piece the height (plus 5") and circumference (plus 2"). This is the piece that wraps around the cushion (piece B).
-- Sew piece B to piece A by taking the long edge of piece B and sewing it around the edge of piece A. Similar to this tutorial- without the piping and second circle.
-- Turn right side out, slip over your cushion and make sure it fits the way you want it.
-- Take the extra height from piece B and staple it to the bottom of your cushion.
-- Match the screw holes and put your legs back on. Ta da! You have a new ottoman with a new slip cover.

Here is a video of me trying to trace out the cushion on my fabric and Wesley helping me :) My favorite part is when he gets scared/excited at second 29- that is how he always gets when we play.

Carhartt Christmas Gifts

Wednesday, January 16, 2013

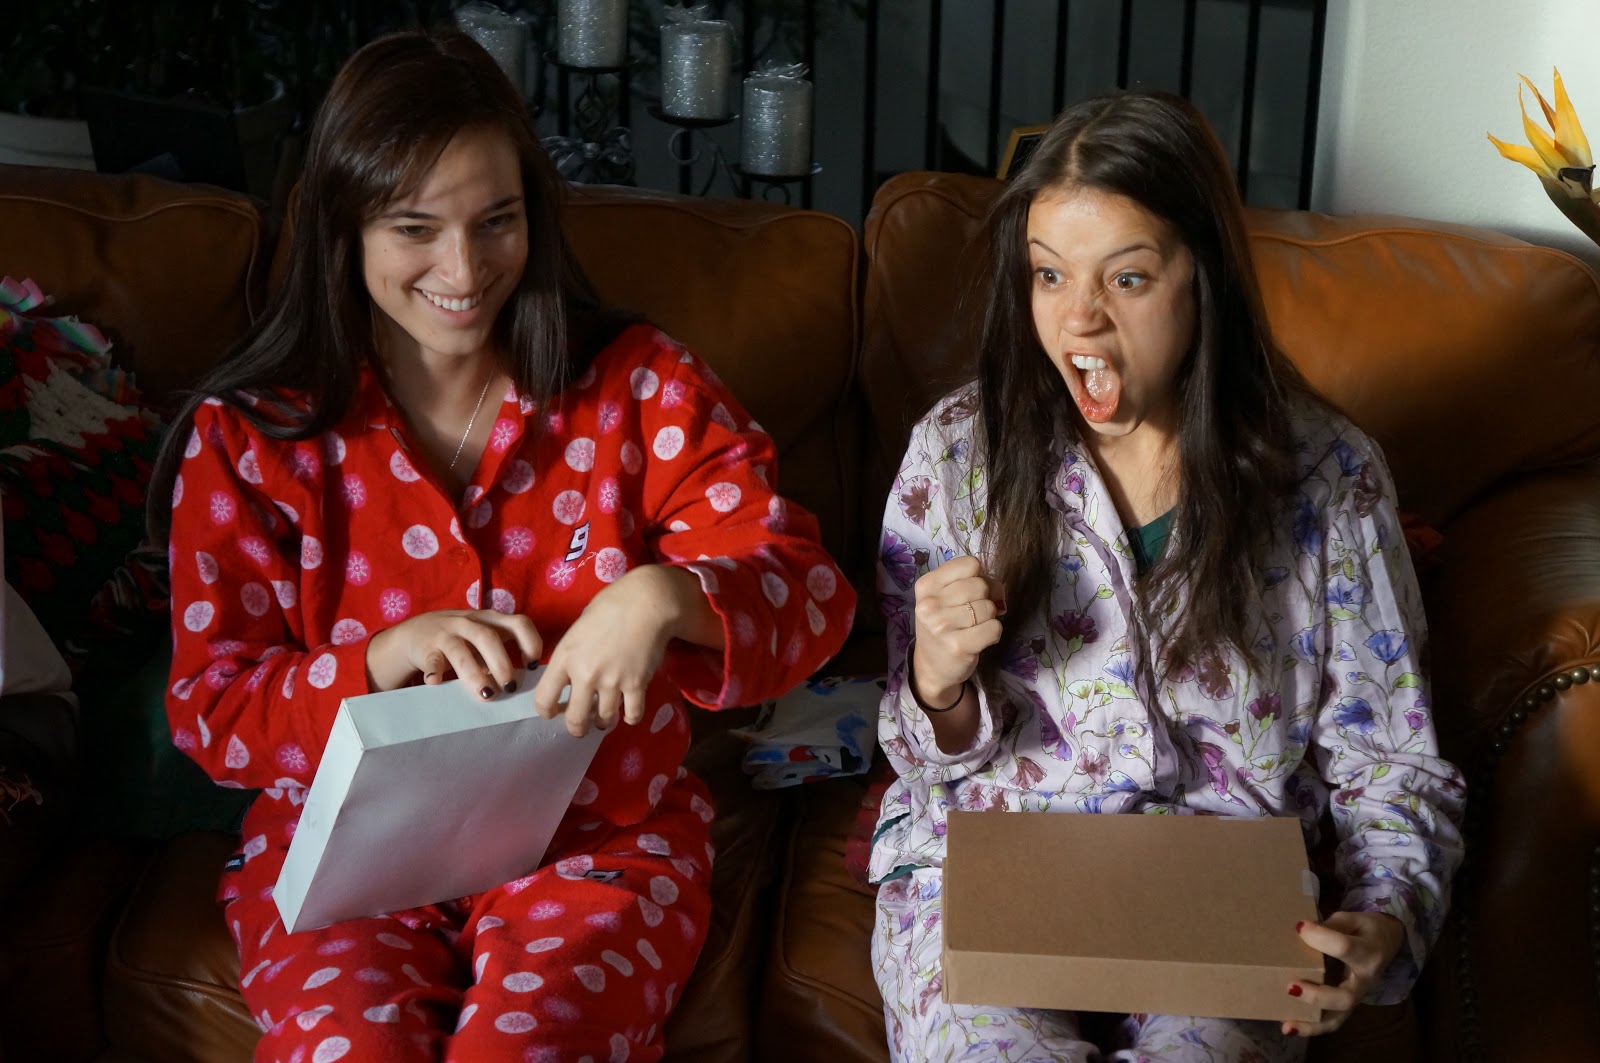
So I made my sisters Carhartt beanies with pom pom's on them because I knew they would love them... I found the inspiration here.

Here is the progression of them opening up their gifts:
                                                           Both opening up their gifts
                                                     Bobo peaking (and super excited!)


 Both super happy!

Mountains + Happy Weekend

Friday, December 14, 2012

We are missing the mountains and won't get to visit soon so I made this little guy earlier in the week as an early Christmas present for Scott. I saw it over on Design Sponge and think it is the perfect addition to our home. 

Our plans for the weekend include celebrating Christmas tomorrow, taking down the tree later in the weekend (but keeping up the lights), loving on Wesley since it is our last weekend with him before our trip to visit our families, getting my nails done (because isn't it so much nicer when you travel to have your nails look nice when you see old friends and family? It's the little things for me) and baking some Christmas goodies for neighbors. 

Happy pillow making and weekend!

DIY Tree Skirt

Tuesday, December 11, 2012

This year I made our tree skirt after seeing this inspiration. It is pretty easy to make and you don't even need to sew anything if you don't want to (and it took me an evening to make)!
 
I bought a yard and a half of wool felt from Joanns and found it to be the perfect amount for this project.

The bottom two steps are optional, you could buy a plain pre-made skirt and attach the flowers
* Draw a perfect circle on your felt. I attached a string (the size of half the circle I wanted) to a marker and drew a circle holding the end of the string in the middle of the felt
* After cutting out your circle, fold it in half twice making a cone. Cut the cone about 3 inches in (or how ever big the base of your tree is. Make it smaller if in doubt, you can always take more away). Cutting 3 inches in will give you a hole of 6 inches. Then cut one straight line from the outside of the skirt to the inside circle so it will slip around the base of your tree.

* Start cutting out a bunch of "leaves". This part takes the longest but just keep cutting. My leaves were about 2 inches in height. I didn't cut from a pattern I just cut the same shape over and over and over
* Attach 5 leaves together to form a flower (reminds me of a poinsettia). I used a needle and thread, but thinking about it I think I should have just saved time and hot glued them together. 
* Attach the flowers, overlapping slightly onto the edge of your tree skirt all the way around with a dollop of hot glue on the bottom of the flower. 

Here you can attach ties (if you made the skirt yourself) to keep it closed. I just hot glued two spare strips of felt and let them dry. Then I used those to tie a knot.

I think next year I am going to sew gold beads into the center of the flowers to give it a little bit more flair. For reference, our tree is about 6 feet tall. 

Merry Christmas All!

Saw It Made It- Scalloped Shorts

Saturday, July 7, 2012


I did it! I made my first pair of shorts ever.  I had this idea that I wanted scalloped shorts and they somehow worked out.  I spent a total of around $7 and it took a couple days. I will share with you how I made them since there is not a good way for me to reproduce and sell them.

AMEdetails All rights reserved © Blog Milk Powered by Blogger